

Image processing under Linux
- Useful functions with convert
- Resizing images
- Appending images
- Cropping images
- Operation on multiple images
- Making time lapse movies
- Movies with growing star trails
- Maximum, minimum and mean operation
- Subtracting two images
- Things you need on your Linux
- Links
Many people still think that Linux is monochrome and you can't even display an
image. On the fist glance the image processing potential under Linux may seem
a little limited compared to those of Windows. But when it comes to automated
image processing, things look totally different and the command line is a
mercy.
You just have to know the commands and options...
In the following I've put together some useful commands for image processing
that I used again and again in the last few years. They might be interesting
for the technically oriented, ambitioned DSLR user working under Linux.
The command line tools might come in handy for users of the SmaTrig
presented on doc-diy.net.
All program packages mentioned are open source or freeware - no money or
criminal activity necessary!
Useful functions with convert
First of all I strongly recommend to bookmark this web page for a detailed help on imagemagick. The imagemagick package is a collection of extremely powerful tools for command line image processing providing the mighty convert. As the name implies it lets you convert different formats, resize images, append, crop, slice... There is virtually no operation not covered by convert. All that works in a second or two. This package is a MUST and probably already installed with your distribution. Just type convert to check. By the way, most of the graphical elements of this web site were created per script using convert.
Resizing images
Resizing images to a lower resolution is often necessary when sending e-mails or preparing a web site. The slow way here is to use Gimp, the quick one is convert. Here we go:
convert image_big.jpg -resize 900x900 image_small.jpg
The important argument here is -resize 900x900 meaning that your new image will be resized to fit in a box of 900x900 pixel. convert never touches the aspect ratio of your image unless you force it. For example, if you have a pic width 1200x800 it will be resized to 900x600 with the command above. If the file size is important,
convert image_big.jpg -resize 900x900 -quality 90 -strip image_small.jpg
lets you control the JPG quality between 0 (pain in your eyes) to 100
(maximum). Fine JPGs directly from a DSLR have a quality of about 97. Values
less that 80 will result in a the early 90ies jpg look. Values between 85 and 95
are a good compromise. The option -strip removes all extra data from
the file header (EXIF etc.) and saves usually 1-4 kB (very important when
creating thumbnails!). The options -strip and -quality
can be used separately of course.
Check the convert documentation for
more help on resize.
Very often a whole batch of images have to be resized. Here a bash loop is helpful. The sequence below resizes all images in the current folder with names starting with 'img' and ending with 'jpg'. The resized images are stored in the folder 'myfolder' (must exist before command is launched) and have an extra 'm' as prefix. Adjust the search pattern (regular expressions after 'for i in') and the naming of the new files to your needs. '$i' contains the name of the file currently processed.
for i in img*jpg; do convert $i -resize 900x900 myfolder/m$i; doneIf you want to have some feedback about which image is processed, add 'echo $i' to the loop:
for i in img*jpg; do echo $i; convert $i -resize 900x900 myfolder/m$i; doneA whole chain of commands can be added following this scheme.
Appending images
Putting multiple images together to one image with a GUI graphical program is a pain. convert allows to do it within a second. Type either
convert -append image_top.jpg image_bottom.jpg result.jpg
for vertical appending (note the - before append) or
convert +append image_left.jpg image_right.jpg result.jpg
for horizontal appending (note the + before append). Simple -- isn't it?
Now if you want to print out six of you passport images as one photo, just
type
convert \( myface.jpg myface.jpg myface.jpg +append \) \
        \( myface.jpg myface.jpg myface.jpg +append \) -append 3x2face.jpg

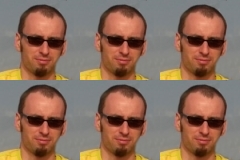
Note that the backslashes are necessary to escape the brackets. There must be also spaces around the brackets.The backslash stands for a new line.
Automated workflows often create a large number of images of equal size. Manual appending is too tedious in such cases. The command montage from the ImageMagick package allows to glue images together to a big matrix with a fixed number of columns:
montage -mode concatenate -tile 6x input* output.jpg
input* is a place holder for the file filter. The input image count doesn't need to make a full matrix. White spaces will close the empty positions. The -tile option specifies how many columns the matrix will have (here 6). The output image size will be the sum on the input images sizes. The output file can become very large!
When the original images are large or too many, it might be useful to resize the originals before appending. This can be done by using the -geometry option. The example below scales the input images to fit into a window of 300 pixel before appendig.
montage -mode concatenate -geometry 300 -tile 6x input* output.jpg
The following command annotates the input images with their original file names. The gravity options are: NorthWest, North, NorthEast, West, Center, East, SouthWest, South, SouthEast.
montage -mode concatenate -geometry 300 -gravity Center -annotate 0 '%f'
     -pointsize 24 -tile 6x input* output.jpg
Cropping images
Cropping images is usually a visual process requiring a GUI. Command line
cropping becomes necessary when working on hundreds of images like in time lapse
movies where you try to match a common resolution like 1080p but don't want to
scale down by just a few percent.
The basic cropping command looks like this:
convert input.jpg -crop 200x100+10+20 output.jpg
Here the 200x100 means that a section of 200 px in the horizontal direction and
100 px in the vertical direction will be cut out. The second pair of numbers
specifies the offset counting form the top left image corner.
As figuring out the right offset parameters is usually tedious, convert lets you
specify the direction in which the crop frame should be automatically moved to.
Just use the -gravity option:
convert input.jpg -gravity Center -crop 200x100+10+20 output.jpg
Possible directions are Center, NorthWest, North, NorthEast, West, East, SouthWest, South, SouthEast.
Check the convert documentation for
more info on advanced cropping.
Operations on multiple images
All operations described here can be put into a bash loop. Here is an example:
for i in *jpg; do convert $i -resize 900x900 -strip 900/m$i; doneThis loop will process all files with the extension 'jpg' in the current folder and store the output images in the folder '900' with the additional prefix 'm'.
Making time lapse movies
The simplest way to create a movie from a series of images is to use a tool called mencoder which is the counterpart of mplayer. If you want to keep your command short, you can rely on mencoders's default parameters and type
mencoder mf://*.jpg -ovc lavc -o hdmovie.mpgto make a movie from all JPGs in the current folder. The parameter -ovc specifies the video codec used. To use the mpeg4 codec with some specs type
mencoder mf://*.jpg -mf fps=20 -ovc lavc
      -lavcopts vcodec=mpeg4:mbd=2:trell:vbitrate=2000 -o movie.mpg
where fps are frames per second and vbitrate is the bit rate. Just play with the parameters to get the best compromise between quality, size and compatibility. If installed, you can use the x264 codec for HD movies:
mencoder mf://*.jpg -mf fps=20 -ovc x264 -o hdmovie.mpg
And finally play you movie with the best video player ever created
mplayer movie.mpg
Don't forget to try mplayer -vo aa movie.mpg. Refer to the documentation for details.
Movies with growing star trails
Image stacks shot with the 'long exposure by parts' trick shown above are good material for a nice time lapse movie of the night skies. The results look even more impressive when the star trails are growing with each movie frame. This 'memory' effect is easily achieved by applying the max operator in a smart way. The following script demonstrates how to do it:#!/bin/bash INI=0 # switch for first loop iteration for i in *jpg # process all jpgs in folder (customize search pattern here) do if [ $INI -eq 0 ]; then # first loop iteration only INI=1 cp $i tmp.jpg # copy first jpg to temp (our memory) fi echo $i # print info convert -evaluate-sequence max $i tmp.jpg tmp.jpg # do max operation cp tmp.jpg trail_$i # copy result with prefix trail_ done rm tmp.jpg # remove temporary image
Execute the script in the folder where the original images are. The script with generate the same number of images with the prefix trail_. You can directly download it here. Don't forget to make it executable by typing chmod u+x star_trails.sh.
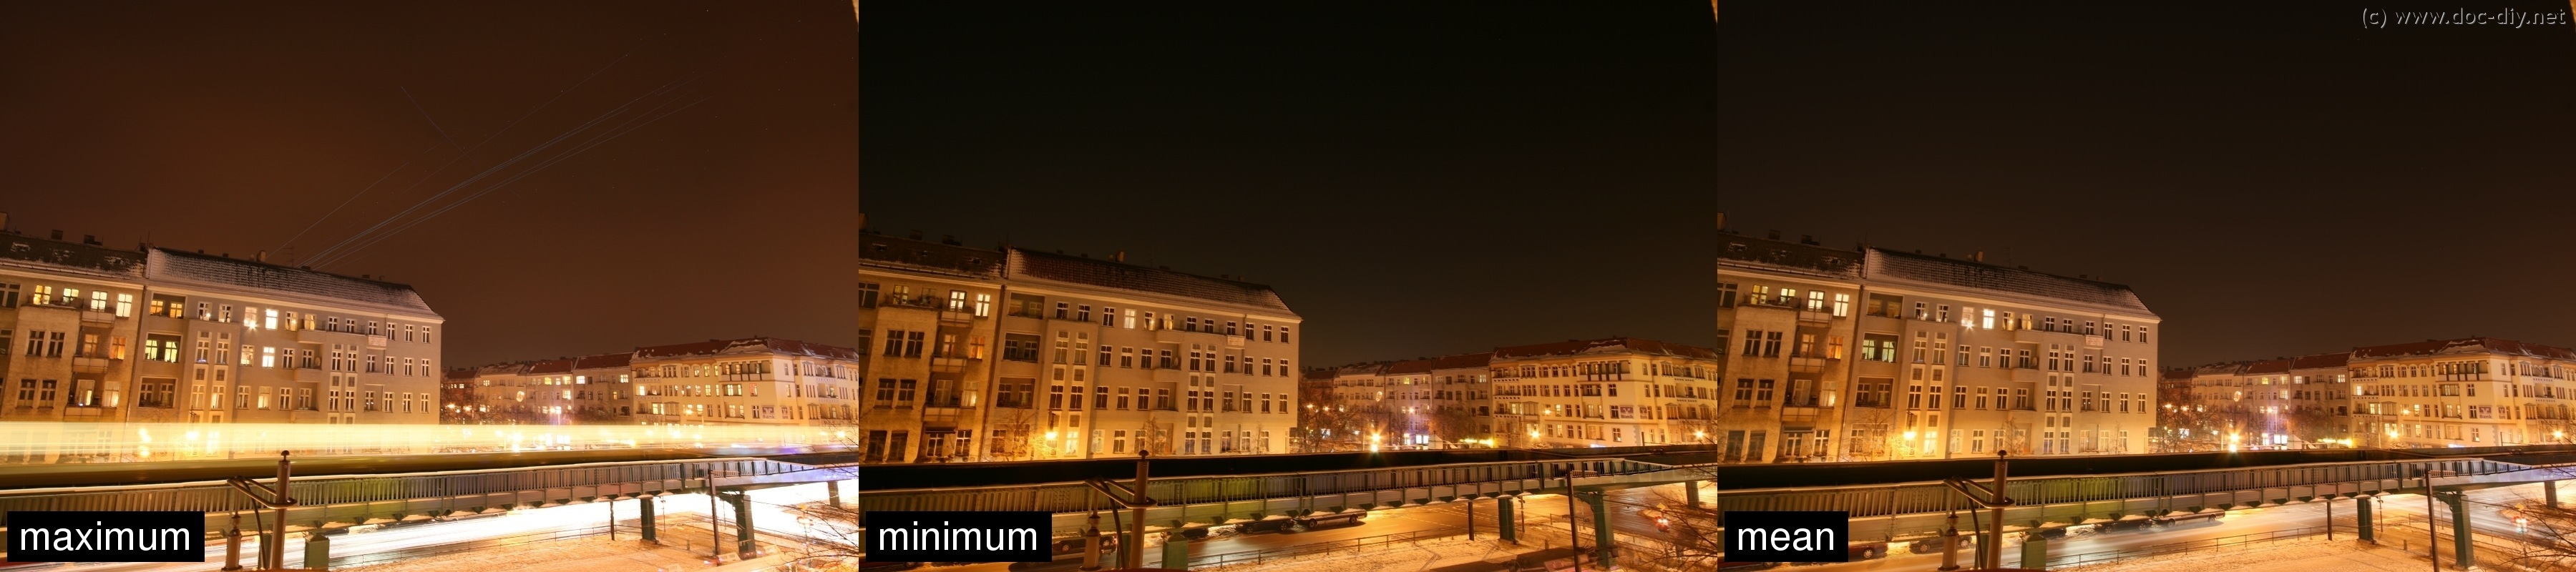
Maximum, minimum and mean operator
These operations work on a stack of images and find the brightest (max),
darkest (min) or the average value (mean) in the stack for each pixel. The
mean operation can be used to average images to reduce noise for example.
The max operation is useful to merge long exposure images as produced by the
convert -evaluate-sequence max *jpg max.jpg
convert -evaluate-sequence min *jpg min.jpg
convert -evaluate-sequence mean *jpg mean.jpg
Here are some example results:

Subtracting two images
Subtracting two images might be useful to remove hot pixels from long exposure pictures. Generally this operation results in interesting effect in combination with the max, min and mean function described above. To subtract image B from image A type:
composite -compose subtract a.jpg b.jpg result.jpg
Below is an example result. The image on the left is composed by taking the maximum of a sequence of long exposure images. The center image is the minimum of the same sequence. The one on the right is the result of the subtraction. Note that the hot pixels disappeared along with the light pollution in the background.

Other useful image prcessing software for Linux
The easiest way to get the programs described below is to use the package manager provided by your Linux distribution.
Gimp
Gimp is the lightweight Photoshop for Linux. It's the number one
option for cloning, exposure adjustment, masks, filters, etc. The learning curve of
Gimp is a little bit steep at its start, so you will need some time to get comfortable
with it. After that you will love it.
www.gimp.org
DCraw and Ufraw
DCraw, with the front end Ufraw, is a raw image converter
for all possible camera models on the market. It allows you to control dozens
of parameters when developing your RAWs to JPGs. Ufraw has a GUI, but can be
used in batch mode too. You can tune the image parameters using the GUI and save the
template for batch processing. This software is an
alternative for Canons DPP or Nikons Capture NX.
http://ufraw.sourceforge.net/
Darktable
Darktable is a fancy looking tool for managing your image files and developing raws.
Thanks for the info Duy Trinh!
http://www.darktable.org/
enfuse
Enfuse is an open source exposure blending program for merging bracketed shots. Unlike Photomatix, enfuse composes the final image from parts of the original images without changing the image content. It uses exposure fusion instead of tone-mapping and returns rather realistic results. It's Very useful for bracketed panoramas. The usage is very simple:
enfuse image1.jpg image2.jpg image3.jpg -o fused.jpg
http://enblend.sourceforge.net/
Hugin
Hugin is a powerful panorama stitching program equipped with a GUI.
This open source project is based on the same smart algorithms like its
commercial competitors Autopano and PTGui. It's maybe less automatised but you
are still able to stitch a pano with about five clicks. Hugin is highly
recommended.
http://hugin.sourceforge.net/
Geeqie / ex gqview
Geeqie is the Irfanview for Linux. This very simple program is good for viewing images, slide shows, checking EXIF data or calling other programs.
Xv
Xv is a very simple command line image viewer perfect for having a quick look at images or just to check their resolution. I love it, because you don't have to take off your hands from the keyboard to view an image. The development stopped many years ago and the installation might be tricky. Imagemagick's display might be an alternative.
Links
http://www.imagemagick.org/usage
Documentation for convert. Bookmark this page or tattoo it on you chest.
http://www.mplayer.hu
mplayer website
http://www.doc-diy.net/photo/smatrig21
Home page of the SmaTrig project. This tiny gadget helps you to shoot
image stacks in an automated way.
http://research.edm.uhasselt.be/~tmertens/papers/exposure_fusion_reduced.pdf
An interesting paper about exposure fusion, a must for enfuse users
Comments (6)
PHP Scripts Temporary Email Throwaway Email


|
Last modified: Sun April 14th 2024 Copyright © 2024 www.doc-diy.net |